Can You Clip a Bumper Back Into Place Without Tools
Yes, you can clip a bumper back into place without tools in many cases. Most modern cars use plastic push clips that snap back easily. This guide covers everything you need to know about reinstalling bumper clips safely and quickly.
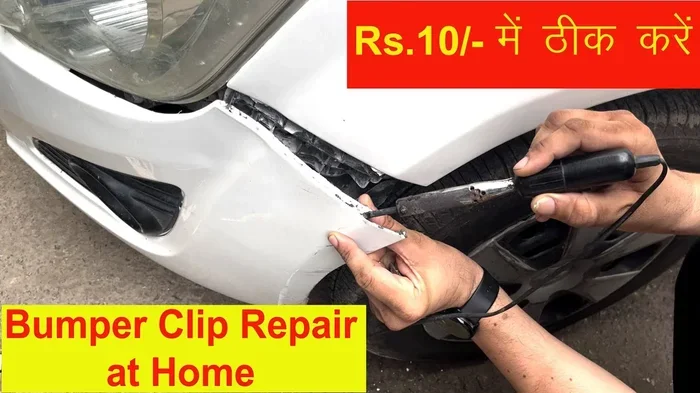
Have you ever hit a curb, backed into a parking post, or gotten into a minor fender bender and found your bumper hanging loose? It is a scary moment. You look at the damage and wonder, can you clip a bumper back into place? The good news is that in most cases, the answer is yes. You can clip a bumper back into place without any fancy equipment. Most modern vehicles use plastic push fasteners that snap right back into their mounting points. You do not need a mechanic, a garage, or even a toolbox for many bumper clip repairs. In this guide, we walk you through everything you need to know about reinstalling bumper clips at home. We cover the different clip types, the step-by-step process, common mistakes to avoid, and tips to keep your car bumper secure for the long haul.
Whether you drive a sedan, SUV, or truck, bumper clips are a standard part of your vehicle’s exterior. They hold the bumper cover tightly against the frame and keep your car looking sleek. When one pops out, it can cause a visible gap, annoying rattles, or even affect aerodynamics. Understanding how these fasteners work puts you in control. You can save time, money, and the hassle of visiting a repair shop for what is often a simple fix. Let us dive in and explore the world of bumper retention clips together.
Key Takeaways
- You can often clip a bumper back without tools: Most bumper retention clips are designed for tool-free reinstallation.
- Identify the clip type first: Push clips, twist locks, and screw-in fasteners each need a different approach.
- Alignment matters more than force: Forcing clips can crack the bumper cover or break the fastener.
- Replace damaged clips immediately: Worn or broken fasteners lead to rattling, gaps, and moisture intrusion.
- Preventive maintenance saves money: Regular checks keep bumper clips secure and your car looking sharp.
- Know when to call a pro: Cracked bumper covers or misaligned panels need professional attention.
📑 Table of Contents
- What Are Bumper Clips and How Do They Work
- Can You Clip a Bumper Back Into Place Without Tools
- Step-by-Step Guide to Reclipping Your Bumper
- Common Mistakes People Make When Reattaching Bumper Clips
- When to Seek Professional Help for Bumper Repair
- Tips for Preventing Bumper Clips from Coming Loose Again
- Quick Tips for a Smooth Bumper Clip Repair
- Conclusion
What Are Bumper Clips and How Do They Work
Bumper clips are small fasteners that connect your bumper cover to the underlying frame or brackets. They are usually made of durable plastic or nylon and are designed to flex slightly when inserted. This flexibility allows them to snap into mounting holes securely. Over time, these clips can wear out, break, or pop out due to impact or vibration.
Most cars use one of several types of plastic fasteners to hold the bumper in place. Understanding which type you have makes the whole process much easier. Let us break down the most common ones.
Types of Bumper Retention Clips
Not all bumper clips are the same. Different vehicles use different fastening systems, and knowing yours helps you reinstall correctly.
- Push-to-install clips: These are the most common. You push them into a hole and they lock in place with a rib or tab.
- Twist-lock clips: These require a quarter-turn after insertion to lock. They offer a tighter hold than push clips.
- Screw-in fasteners: Some bumper clips use a screw base. You need a screwdriver to remove and reinstall these.
- Spring clip fasteners: These use a spring mechanism to grip the mounting point. They are common on older vehicles.
- Snap-fit retainers: These are designed for specific models and often have a unique shape that matches the bumper mount.
You can usually find your vehicle’s clip type in the owner manual. Auto parts stores also carry clip kits specific to your car model. Having the right replacement clips on hand makes a huge difference when you are doing DIY bumper repair at home.
Why Bumper Clips Break or Pop Out
Bumper clips are not indestructible. They experience stress every time you drive over bumps, park, or encounter road debris. Here are the most common reasons clips fail.
- Aging and wear: Plastic becomes brittle over time, especially with exposure to sun and weather.
- Impact damage: Hitting a curb, parking block, or another vehicle can pop clips out or crack them.
- Vibration: Constant driving vibration loosens clips gradually, especially on rough roads.
- Improper removal: Yanking clips out carelessly during a previous repair can weaken or break them.
- Over-tightening: If screws or bolts are too tight, they can crack the surrounding plastic and compromise the clip.
Understanding why clips fail helps you prevent future problems. Regular inspection of your car bumper can catch worn clips before they cause bigger issues.
Can You Clip a Bumper Back Into Place Without Tools
The short answer is yes, you can clip a bumper back into place without tools in most situations. Push-to-install clips and snap-fit retainers are specifically designed for tool-free operation. You simply align the clip with the mounting hole and press it firmly until it snaps in. However, twist-lock clips and screw-in fasteners may need a basic tool like a flathead screwdriver or a quarter-turn motion.
Here is what you need to know about bumper reinstallation without tools.
When It Works Without Tools
For standard push clips, the process is straightforward. You locate the empty mounting point on the bumper frame, align the clip, and press it straight in until you hear or feel a click. Most push clips have a rib that expands as you push them through the hole. Once past the hole, the rib snaps back and locks the clip in place. No tools required.
This method works well for:
- Minor bumper detachments where clips simply popped out
- Replacing a single broken clip with a new push fastener
- Reattaching the bumper after cleaning or minor maintenance
- Temporary fixes before a proper repair
The key is to work carefully and avoid rushing. Bumper alignment is critical. If the bumper is not seated correctly, the clips will not lock properly and you will end up with gaps or loose panels.
When You Need Basic Tools
Some situations do require basic tools. If your vehicle uses twist-lock clips, you will need to rotate each clip a quarter turn after inserting it. A pair of needle-nose pliers can help with this. Screw-in fasteners obviously need a screwdriver or drill. In these cases, you are not doing a fully tool-free repair, but you still do not need expensive equipment.
Having a basic toolkit on hand makes auto body repair at home much more manageable. A few commonly needed items include:
- A flathead or Phillips screwdriver
- A set of needle-nose pliers
- A clip removal tool (inexpensive and widely available)
- A flashlight to see into tight spaces
- A soft cloth to protect the bumper surface
Even with tools, the job is simple and takes less than 30 minutes for most bumper clip repairs. This is one of the easiest do it yourself car maintenance tasks you can tackle.
Step-by-Step Guide to Reclipping Your Bumper
Now that you understand the clip types and when tools are needed, let us walk through the actual process of clipping a bumper back into place. Follow these steps carefully for the best results.
Preparing the Bumper and Area
Before you start, make sure your vehicle is parked on a flat surface and the engine is off. If you are working near the front bumper, turn the steering wheel away from the side you are working on to give yourself more room.
First, inspect the bumper cover and the mounting area. Look for any cracks, breaks, or damage to the plastic. If the bumper cover itself is cracked, clips alone will not hold it properly. You may need a more involved car bumper repair or even a replacement cover.
Next, clean the mounting points. Dirt, debris, and old clips can block the holes and prevent new clips from seating correctly. A quick wipe with a cloth is usually all it takes. If you are replacing old clips, remove any broken pieces from the mounting holes before proceeding.
Aligning and Snapping the Clips
Start at one end of the bumper and work your way across. This ensures even alignment and prevents you from missing any mounting points. Here is the process:
- Insert the clip into the bumper cover first, if it is not already attached.
- Align the clip with the mounting hole on the frame or bracket.
- Press the clip straight in with firm, even pressure.
- Listen or feel for the click that indicates the clip is locked.
- Move to the next clip and repeat the process.
- Once all clips are in, gently tug the bumper to test its hold.
Do not force any clip. If it does not go in easily, stop and check the alignment. Forcing a clip can crack the bumper cover or damage the fastener. Patience is your best friend during this process.
After all clips are installed, visually inspect the bumper from a distance. Look for even gaps between the bumper and the body panels. If you see uneven spacing, one or more clips may not be fully seated. Press them in again or check for debris blocking the hole.
Common Mistakes People Make When Reattaching Bumper Clips
Even simple repairs come with pitfalls. Knowing the common mistakes helps you avoid them and get a clean, lasting result.
Forcing Clips Into Place
The number one mistake is using too much force. If a clip does not go in smoothly, something is wrong. It could be misaligned, the wrong size, or the hole could be blocked. Forcing it risks cracking the bumper cover or breaking the clip. Stop, reassess, and try again with a different approach.
Remember, bumper retention clips are designed to flex. They should go in with firm, steady pressure, not with a hammer or a shove. If you find yourself struggling, take a break and come back with fresh eyes.
Ignoring Alignment Issues
Another common mistake is not checking alignment before securing all the clips. If the bumper is even slightly off-center, forcing all the clips in will lock it in the wrong position. This leads to visible gaps, poor aerodynamics, and uneven stress on the clips.
Always hold the bumper in position and check the gaps around the edges before inserting any clips. Use your hands to push the bumper into the correct position first. Then work the clips in one by one, starting from the center and moving outward.
Using the Wrong Replacement Clips
Not all bumper clips are universal. Using the wrong size or type of fastener can lead to a loose bumper or clips that pop out again quickly. Always match replacement clips to your vehicle’s make, model, and year. Auto parts stores can help you find the right fit, or you can order a clip kit online.
When to Seek Professional Help for Bumper Repair
Most bumper clip repairs are simple and safe to do at home. However, there are situations where professional help is the better choice. Knowing the difference saves you from making a costly mistake.
Signs Your Bumper Needs More Than Clip Repair
Watch for these warning signs that indicate the damage goes beyond a loose clip:
- Cracks in the bumper cover: Clips cannot hold a cracked bumper securely. The crack will worsen over time.
- Dented or deformed bumper: If the bumper is bent or creased, it may need professional straightening before reinstallation.
- Exposed sensors or lights: If the damage affected parking sensors, cameras, or headlights, a professional should handle the repair.
- Severe misalignment: If the bumper sits noticeably crooked, the underlying frame may be damaged.
- Multiple clips broken: If more than a few clips are damaged, the bumper may need to be removed and professionally reinstalled.
In these cases, a professional auto body repair shop has the tools, experience, and materials to restore your bumper properly. It is worth the investment to ensure safety and structural integrity.
Cost Considerations
One of the biggest advantages of a DIY clip repair is the cost savings. Replacing a few bumper clips costs just a few dollars. Professional bumper repair, on the other hand, can range from $100 to $500 or more depending on the damage. For simple clip issues, doing it yourself makes perfect sense financially.
However, if the damage is extensive, getting a professional estimate is wise. Many shops offer free inspections and can tell you exactly what needs to be done. This helps you make an informed decision about whether to DIY or hire a pro.
Tips for Preventing Bumper Clips from Coming Loose Again
Once you have successfully reattached your bumper, you want to keep it that way. Preventive maintenance goes a long way in extending the life of your bumper fasteners and avoiding repeat repairs.
Regular Maintenance Checks
Make it a habit to inspect your bumper clips every few months. Look for loose clips, gaps, or signs of wear. A quick check during car washes or when you are washing your vehicle at home takes only a few minutes. Catching a loose clip early prevents it from becoming a bigger problem.
Here are some simple maintenance tips:
- Check clips after driving over rough terrain or speed bumps
- Inspect the bumper after any minor parking incident
- Clean mounting holes regularly to prevent debris buildup
- Replace any clip that shows signs of cracking or wear immediately
- Keep a spare clip kit in your trunk for emergencies
Upgrading to Better Fasteners
If your vehicle is older or you frequently drive in tough conditions, consider upgrading to higher-quality bumper retention clips. Aftermarket clips made from reinforced nylon or metal-reinforced plastic last longer than standard factory clips. They are still affordable and easy to install. This small upgrade can save you from repeated repairs and keep your vehicle exterior looking great.
Another tip is to apply a small amount of silicone lubricant to the clips during installation. This reduces friction and helps them seat more smoothly. It also prevents the plastic from grinding against the mounting points, which can cause wear over time.
Quick Tips for a Smooth Bumper Clip Repair
Before you grab those clips and get to work, here are some quick tips to make the job easier and faster.
- Work in good lighting: A flashlight or working in daylight helps you see the mounting points clearly.
- Take photos before removal: If you removed the bumper, photos help you remember exactly where each clip goes.
- Start from the center: Working from the middle outward ensures even pressure and proper alignment.
- Use a soft cloth: Wrapping the bumper in a cloth prevents scratches while you press clips in.
- Test after each row: Tug gently on each section as you go to catch loose clips early.
- Keep spare clips handy: Always have extras on hand. You never know when one will break during the process.
These small steps make a big difference. They turn a potentially frustrating repair into a quick, satisfying DIY car maintenance win.
Conclusion
So, can you clip a bumper back into place? Absolutely. With the right knowledge and a little patience, most bumper clip repairs are simple enough to handle at home. Whether you are dealing with a single popped clip or a bumper that came partially loose after a minor impact, the process is straightforward. Identify your clip type, align carefully, press firmly, and test the result. Bumper clip repair is one of the most accessible and rewarding do it yourself car maintenance tasks you can do.
Remember to replace damaged clips, check alignment, and inspect your bumper regularly. These habits keep your car safe, looking great, and running smoothly. If the damage is beyond a simple clip issue, do not hesitate to seek professional help. Your safety and the structural integrity of your vehicle always come first.
Now that you know how easy it is to clip a bumper back into place, you have the confidence to handle this common car issue on your own. Grab those clips, follow the steps, and enjoy the satisfaction of a job well done. Your car bumper will thank you for it.
Frequently Asked Questions
Can you clip a bumper back into place on your own?
Yes, most bumper clip repairs are simple enough to do at home. Push-to-install clips snap back into place with firm pressure and no tools. Just make sure you identify the clip type and align the bumper correctly before securing it.
What tools do you need to clip a bumper back into place?
For standard push clips, you need no tools at all. For twist-lock or screw-in fasteners, a flathead screwdriver or needle-nose pliers helps. A basic toolkit with a flashlight and soft cloth is also useful for a clean repair.
How long does it take to clip a bumper back into place?
Most bumper clip repairs take between 15 and 30 minutes. The time depends on how many clips need replacing and whether the bumper is fully detached or just partially loose. Simple push clip repairs are the fastest.
Can a broken bumper clip cause further damage?
Yes, a missing or broken clip can lead to bumper rattling, gaps, and moisture getting behind the bumper cover. Over time, this can cause rust, damage to sensors, or further cracking of the bumper. Replace broken clips promptly.
How much does it cost to replace bumper clips?
Bumper clip replacements are very affordable. Individual clips cost just a few dollars each, and clip kits for an entire bumper typically range from $5 to $20. This makes DIY repair one of the most budget-friendly car maintenance tasks.
When should you see a professional for bumper clip repair?
See a professional if the bumper cover is cracked, severely dented, or misaligned. Also seek help if multiple clips are damaged, sensors or lights are affected, or the bumper does not sit flush after reinstallation. Safety always comes first.