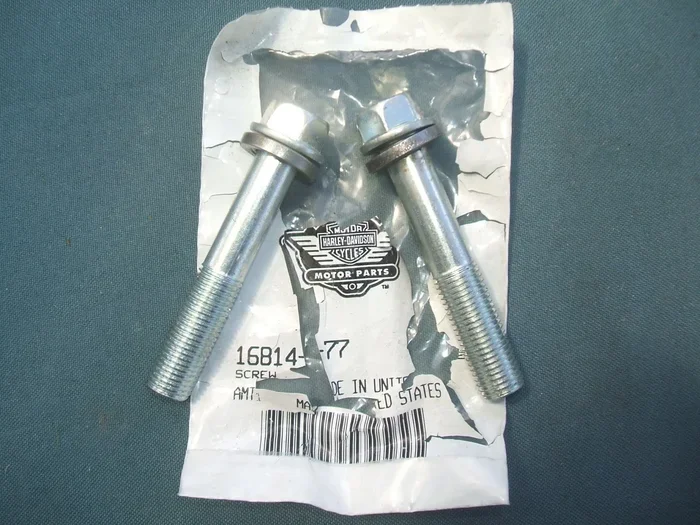
Harley-Davidson Bolt Size Chart – Everything You Need
Our Harley-Davidson Bolt Size Chart gives you every bolt measurement you need for your motorcycle. Whether you are rebuilding an engine or swapping out parts, knowing the right bolt size saves time and prevents costly mistakes. This guide covers bolt sizes by model, thread pitch, torque specs, and the tools you need. You will find practical tips, common mistakes to avoid, and expert advice that makes the job easier. Use this chart as your go-to reference for any Harley-Davidson bolt replacement project.
Every Harley-Davidson owner knows the thrill of working on their own bike. There is something deeply satisfying about turning a wrench and knowing you are keeping the machine running strong. But here is the thing — getting the right bolt size can make or break your entire project.
A Harley-Davidson Bolt Size Chart is not just a reference sheet. It is your roadmap to a successful build or repair. Whether you are replacing a simple exhaust bolt or rebuilding a big-twin engine, having the right measurements at your fingertips changes everything. This guide walks you through every bolt size, thread pitch, and torque spec you will ever need.
We keep it simple and practical. No confusing jargon. No guessing games. Just clear, actionable information that gets you back on the road faster. Let us dive in.
Key Takeaways
- Correct bolt sizing matters: Using the wrong bolt can damage your engine or compromise safety.
- Know your model: Bolt sizes vary across Harley-Davidson models and engine types.
- Bolt grade is critical: Always replace bolts with the correct grade for strength and reliability.
- Keep the right tools ready: A proper socket set and torque wrench make the job faster and safer.
- Follow torque specs: Over-tightening or under-tightening bolts causes serious problems.
- OEM vs aftermarket: Understand the differences before choosing replacement bolts.
📑 Table of Contents
- What Is a Harley-Davidson Bolt Size Chart and Why Does It Matter?
- Common Harley-Davidson Bolt Sizes by Model
- Understanding Bolt Grades and Thread Sizes
- Essential Tools for Working with Harley-Davidson Bolts
- Step-by-Step Guide to Using the Harley-Davidson Bolt Size Chart
- Common Mistakes When Replacing Harley-Davidson Bolts
- Where to Find the Right Harley-Davidson Bolts and Hardware
- Key Takeaways
- Conclusion
What Is a Harley-Davidson Bolt Size Chart and Why Does It Matter?
A Harley-Davidson bolt size chart is a detailed reference that lists every bolt measurement used across different Harley models. It includes bolt diameter, thread pitch, length, head size, and grade. Think of it as the ultimate cheat sheet for any bolt-related job on your motorcycle.
Why does this matter so much? Because motorcycles run at high speeds and under extreme vibration. A single wrong bolt can loosen, strip, or even fail. That is not just an inconvenience. It is a safety risk. Using the correct motorcycle bolt specifications ensures every part stays exactly where it should be.
Here is what a typical chart covers:
- Bolt diameter: measured in millimeters or fractions of an inch
- Thread pitch: the distance between threads on the bolt
- Bolt length: how long the bolt needs to be for proper engagement
- Socket size: the wrench size needed to install or remove the bolt
- Bolt grade: the strength rating of the fastener material
- Torque specification: how tight the bolt should be tightened
When you work with the right fastener chart, you eliminate guesswork. You know exactly what to buy, what to use, and how tight to go. That confidence makes every repair better.
Why Harley-Davidson Bolts Are Different
Harley-Davidson motorcycles use a mix of standard bolt sizes and metric bolt sizes. This is important to understand because you cannot mix them up. A standard 1/2-inch bolt will not fit a metric hole, and vice versa.
Older Harley models from the 1950s through the 1970s mostly used standard (SAE) measurements. Newer models, especially those built after 2000, lean heavily toward metric specifications. Some bikes even use a combination of both on the same engine. This is exactly why a bolt sizing guide specific to Harley-Davidson is so valuable.
Also, Harley engines run hot and vibrate intensely. The bolt grade matters more here than on most other bikes. A low-grade bolt can shear under stress, leading to catastrophic engine failure. Always check the grade before you buy.
Common Harley-Davidson Bolt Sizes by Model
Not all Harleys are the same, and neither are their bolts. Let us break down the most common bolt sizes by model so you know what to look for.
Sportster Models (Iron 883, Forty-Eight, etc.)
The Sportster line uses a mix of standard and metric bolts. The engine block bolts are typically 10mm metric with a fine thread pitch. The cylinder head bolts on older Sportsters are usually 3/8-inch standard size. Wheel axle bolts on most Sportsters are 1/2-inch standard with a 20-thread-per-inch pitch.
Quick tip: always double-check the year of your model. Harley changed some specs between model years, and using an outdated chart can lead to the wrong part.
Softail Models (Street Bob, Fat Boy, etc.)
Softail models use larger bolts in many areas because of their heavier frame and larger engine options. The engine mounting bolts are typically 12mm metric. The exhaust flange bolts are commonly 10mm with a 1.25 thread pitch. Rear axle bolts are usually 1/2-inch standard size.
If you are working on a Softail bolt pattern, make sure you have a chart specific to your year. The bolt layout changed across different Softail generations.
Touring Models (Road King, Street Glide, Road Glide, etc.)
Touring bikes have more bolts because of the extra accessories and larger engine assemblies. The engine case bolts are commonly 12mm metric. Cylinder head bolts on Twin Cam engines are typically 10mm with a 1.25 pitch. The front axle bolt on most Touring models is 1 inch standard size.
These bikes also have many accessory bolts for saddlebags, fairings, and windshields. Keeping a Harley-Davidson hardware kit on hand is a smart move for touring owners.
Dyna Models (Fat Bob, Low Rider, etc.)
Dyna models sit in the middle when it comes to bolt sizes. Engine mounting bolts are 12mm metric. The transmission case bolts are often 10mm or 3/8-inch depending on the year. Primary cover bolts are typically 1/2-inch standard.
Because Dyna models span many years, always confirm the bolt pattern for your specific model year before ordering parts.
Understanding Bolt Grades and Thread Sizes
This is where many DIY mechanics get tripped up. Not all bolts are created equal. The bolt grade tells you how strong the bolt is, and using the wrong grade can be dangerous.
What Bolt Grades Mean
Bolt grades are marked on the head of the bolt. You will commonly see Grade 2, Grade 5, and Grade 8 on standard bolts. For metric bolts, the grades are 8.8, 10.9, and 12.9. Higher numbers mean stronger bolts.
Harley-Davidson engines typically require Grade 8 or metric 10.9 bolts in high-stress areas like the engine block and cylinder head. Lower-grade bolts are fine for non-critical parts like accessories and covers.
Thread Pitch Explained
Thread pitch is the distance between the threads on a bolt. It is measured in millimeters for metric bolts and threads per inch for standard bolts.
Here is a simple comparison table to help you understand the difference:
- Standard (SAE) thread pitch: measured in threads per inch, commonly used on older Harleys
- Metric thread pitch: measured in millimeters between threads, used on newer Harleys
- Fine thread pitch: more threads per inch, provides a stronger hold in thin materials
- Coarse thread pitch: fewer threads per inch, easier to install and remove
Using the wrong thread pitch is one of the most common mistakes people make. A coarse bolt will not fit properly into a fine-thread hole, and forcing it can strip the threads completely.
Why Thread Pitch Matters for Harley Engines
Harley engines have many fine-thread bolts in critical areas. The cylinder head bolts, for example, use a fine pitch to maintain even clamping pressure across the head. If you replace these with coarse-thread bolts, you risk uneven pressure, gasket leaks, and engine damage.
Always match the thread pitch exactly. When in doubt, consult your Harley-Davidson bolt size chart before purchasing any replacement fasteners.
Essential Tools for Working with Harley-Davidson Bolts
Having the right tools makes every bolt job easier and safer. You do not need a massive workshop. A few key tools will handle most Harley bolt jobs.
The Must-Have Tool List
- Metric and standard socket set: You need both because Harleys use both measurement systems
- Torque wrench: This is non-negotiable. Over-tightening bolts is one of the top causes of engine damage
- Bolt gauge thread checker: Helps you verify the thread pitch before installing a bolt
- Extension bars and universal joints: Help you reach bolts in tight spaces on the engine
- Penetrating oil: Old Harley bolts love to seize up, and a good penetrating oil saves the day
- Thread chaser or die set: For repairing stripped threads in the engine block or frame
Invest in a quality torque wrench. It is the single most important tool for bolt work on a Harley. A click-type torque wrench gives you an audible signal when you reach the correct tightness. This prevents over-tightening every single time.
Quick Tips for Tool Use
Always clean bolt holes before installing new bolts. Dirt and old thread locker can give you false torque readings. Use a wire brush or compressed air to clean the threads. Apply a small amount of anti-seize compound to bolts that will be exposed to heat and vibration.
Never reuse bolts that have been stretched or deformed. One-time use bolts are common in Harley engine assembly. Reusing them compromises clamping force and can lead to failure.
Step-by-Step Guide to Using the Harley-Davidson Bolt Size Chart
Now that you understand the basics, let us walk through how to actually use a Harley-Davidson bolt size chart in a real repair scenario.
Step 1: Identify Your Motorcycle Model and Year
Start by finding your exact model and year. This information is on your VIN plate or in the owner’s manual. The bolt size chart changes from year to year, so accuracy here is essential.
Step 2: Locate the Bolt You Need to Replace
Identify the specific bolt by its location on the engine or frame. Take a photo and note the area — engine block, cylinder head, transmission, wheel, exhaust, or body panel. Each area has different bolt requirements.
Step 3: Find the Correct Size in the Chart
Look up the bolt in the chart by model, year, and location. Note the diameter, thread pitch, length, socket size, and grade. Write these down or keep the chart handy while you work.
Step 4: Remove the Old Bolt Carefully
Apply penetrating oil to the bolt if it is stuck. Let it sit for a few minutes. Use the correct socket size and remove the bolt slowly. If the bolt is stripped or broken, do not force it. Use an extractor tool instead.
Step 5: Install the New Bolt with the Correct Torque
Clean the bolt hole thoroughly. Apply anti-seize if recommended. Thread the new bolt in by hand first to avoid cross-threading. Then use your torque wrench to tighten to the exact specification listed in the chart.
Repeat these steps for every bolt you replace. Consistency is key to a reliable repair.
Expert Insight: The Role of Thread Locker
Many Harley bolts require thread locker to stay secure under vibration. The chart will sometimes specify the type and color of thread locker to use. Blue thread locker (medium strength) is common for most bolts. Red thread locker (high strength) is used for bolts that must never loosen. Always follow the manufacturer’s recommendation.
Common Mistakes When Replacing Harley-Davidson Bolts
Even experienced riders make mistakes with bolts. Here are the most common ones and how to avoid them.
Mistake 1: Guessing the Bolt Size
Never guess. A bolt that is even one millimeter off will not seat properly. Always use a bolt sizing guide or the chart. If you are unsure, take the old bolt to a parts store and match it physically.
Mistake 2: Ignoring Bolt Grade
Using a Grade 5 bolt where a Grade 8 is required is a serious mistake. The weaker bolt can stretch or snap under load. Always match the bolt grade specified in the chart.
Mistake 3: Over-Tightening
More torque does not mean a better connection. Over-tightening strips threads, warps surfaces, and can crack engine cases. Use a torque wrench and follow the spec exactly.
Mistake 4: Mixing Standard and Metric Bolts
This is a dangerous and common error. A standard bolt in a metric hole can damage the thread. Keep your standard bolt sizes and metric bolt sizes organized and clearly labeled.
Mistake 5: Skipping Anti-Seize Compound
Skipping anti-seize makes future removal much harder. Harley bolts in hot areas like the exhaust can seize permanently without it. Apply a thin coat to any bolt exposed to heat.
Common Mistakes at a Glance
- Guessing bolt sizes instead of using a chart
- Using the wrong bolt grade for the application
- Over-tightening bolts without a torque wrench
- Mixing standard and metric fasteners
- Forgetting anti-seize on heat-exposed bolts
- Reusing one-time-use bolts
- Not cleaning bolt holes before installation
Where to Find the Right Harley-Davidson Bolts and Hardware
Once you know what you need, the next step is finding the right parts. There are several reliable sources for Harley-Davidson bolt replacements.
Your local Harley-Davidson dealer is the most direct source for OEM bolts. They have access to the exact parts used during assembly. The downside is that OEM parts can be more expensive than alternatives.
Online retailers specializing in motorcycle parts often carry both OEM and aftermarket options. Look for sellers who provide detailed bolt specifications including grade, thread pitch, and material. This transparency is a good sign of a reputable supplier.
If you prefer to buy in bulk or need a complete hardware kit, consider purchasing a Harley-Davidson hardware kit. These kits come with all the bolts, nuts, and washers you need for a specific job. They are especially useful for engine rebuilds and full bike restorations.
When buying aftermarket bolts, make sure they are made from quality materials. Stainless steel and chrome-vanadium steel are the most common and reliable options. Avoid cheap bolts with no grade markings. They are a safety risk.
How to Verify Bolt Quality
Check the markings on the bolt head. Grade 8 bolts have six radial lines. Metric 10.9 bolts have a number 10.9 stamped on the head. If there are no markings at all, do not use the bolt. Unmarked bolts are typically low-quality and unreliable.
Also check the material finish. Quality bolts have a consistent coating with no rough edges or burrs. The threads should be smooth and evenly spaced. These small details make a big difference in performance and longevity.
Key Takeaways
- Always use a chart: A Harley-Davidson bolt size chart is essential for any bolt replacement project.
- Match the grade: Using the correct bolt grade ensures strength and safety under vibration and heat.
- Know your model: Bolt sizes differ across Sportster, Softail, Touring, and Dyna models.
- Use the right tools: A torque wrench and proper socket set prevent damage and ensure correct tightness.
- Avoid common mistakes: Do not guess sizes, mix standard and metric bolts, or skip anti-seize compound.
- Buy quality parts: Choose OEM or reputable aftermarket bolts with proper grade markings.
Conclusion
A Harley-Davidson Bolt Size Chart is one of the most valuable tools in your maintenance arsenal. It takes the guesswork out of bolt replacement and helps you do the job right the first time. From engine bolts to exhaust fasteners, wheel hardware to body panel screws, every bolt on your Harley has a specific size, grade, and torque requirement.
By following the chart, using the right tools, and avoiding common mistakes, you protect your investment and keep your bike running safely. The time you spend learning your bolt sizes pays off every time you turn a wrench.
Keep this guide bookmarked. Refer to it before every bolt replacement job. Share it with fellow Harley owners who might benefit from it. And most importantly, ride safe and ride proud.
Frequently Asked Questions
What is the most common bolt size used on Harley-Davidson engines?
The most common bolt sizes are 10mm and 12mm for metric bolts, and 3/8-inch and 1/2-inch for standard bolts. The exact size depends on the engine type and the specific location on the bike. Always refer to the Harley-Davidson bolt size chart for your model year.
Can I use aftermarket bolts instead of OEM bolts on my Harley?
Yes, you can use aftermarket bolts as long as they match the exact specifications in the chart. This includes diameter, thread pitch, length, and bolt grade. High-quality aftermarket bolts from reputable brands are a safe and often more affordable alternative to OEM parts.
How do I know if a bolt is metric or standard?
Metric bolts are marked with measurements in millimeters, such as 10mm x 1.25. Standard bolts are marked in inches, such as 3/8-inch x 16 threads per inch. You can also check the head markings. Grade 8 standard bolts have six radial lines, while metric 10.9 bolts have a 10.9 stamp.
What happens if I over-tighten a Harley bolt?
Over-tightening can strip threads, warp mating surfaces, crack engine cases, and break bolts. It can also cause gasket leaks that lead to oil or coolant loss. Always use a torque wrench and follow the tightness specifications in the bolt sizing guide for your model.
Should I apply thread locker to every bolt on my Harley?
No, not every bolt needs thread locker. The chart will specify which bolts require it. Typically, bolts in high-vibration areas like the engine and exhaust need thread locker. Bolts on accessories and covers usually do not. Using thread locker where it is not needed can make future removal very difficult.
Where can I find a printable Harley-Davidson bolt size chart?
Many motorcycle parts websites and Harley-Davidson forums offer free printable charts. Your owner’s manual also contains torque and sizing specifications. For the most accurate and complete chart, check with your local Harley-Davidson dealer or a trusted online retailer that specializes in motorcycle hardware.