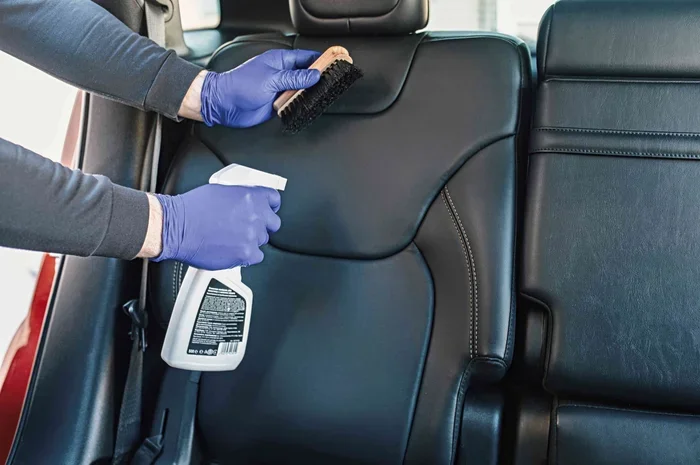
Can You Use Windex on Leather Seats Without Ruining Them
Many people wonder, can you use Windex on leather seats without causing damage? The short answer is that Windex is generally not recommended for leather seats because it contains harsh chemicals that can strip the natural oils and finish from your leather upholstery. In this article, we’ll explore safer cleaning solutions and effective leather care strategies.
Key Takeaways
- Windex is too harsh for leather: The ammonia and surfactants in Windex can dry out, crack, and discolor leather seats over time.
- Leather needs gentle cleaning: Use pH-balanced leather cleaners and microfiber cloths instead of household cleaners.
- Conditioning is essential: Regular leather conditioner application protects the surface and extends seat life.
- Vinegar solution is a safer DIY option: A mix of water and white vinegar can clean leather without the damage Windex causes.
- Prevention beats repair: Applying a leather protectant and avoiding direct sunlight goes a long way.
- Professional detailing helps: For deep stains, a leather restoration expert delivers better results than DIY methods.
- Quick action matters: Spills should be cleaned immediately to prevent permanent staining on leather upholstery.
[FEATURED_IMAGE_PLACEHOLDER]
Introduction
You just spilled your coffee on your beautiful leather car seats. Panic sets in. You grab the nearest spray bottle and wonder, “Can I just use Windex on leather seats?” It’s a common question. Many people reach for household cleaners without thinking twice. But the truth is, Windex and leather don’t mix well.
In this guide, we’ll answer the big question: can you use Windex on leather seats without ruining them? More importantly, we’ll show you what to do instead. You’ll learn safe cleaning methods, effective alternatives, and how to keep your leather seats looking great for years. Let’s dive in and protect your investment.
Why Windex Is Tempting but Risky for Leather
Let’s be honest. Windex is everywhere in every household. It’s the go-to spray for windows, countertops, and just about anything shiny. So when your leather seats get smudgy or stained, it’s natural to grab that familiar blue bottle. But here’s the problem.
The Ingredients in Windex That Hurt Leather
Windex contains several ingredients that are tough on leather. Here’s what’s typically inside:
- Ammonia: This is the big one. Ammonia dries out leather quickly. It strips away the natural oils that keep leather soft and flexible.
- Surfactants: These cleaning agents are great for glass but too aggressive for delicate leather surfaces.
- Alcohol: Some Windex formulas include alcohol. Alcohol accelerates drying and can cause cracking.
- Dyes and fragrances: These can leave residue or discolor your leather seats.
Leather is an organic material. It’s essentially treated animal skin. It needs care that respects its natural structure. Windex was never designed for this purpose. Using it on leather seats is like using sandpaper on a silk shirt. It might seem like a quick fix, but the damage can be serious.
Why People Reach for Windex
Nobody wakes up wanting to damage their car interior. People use Windex on leather because:
- It’s instantly available in most homes.
- It works fast on hard surfaces.
- They assume all cleaning sprays work similarly.
- The cost of leather-specific products feels unnecessary.
These reasons make sense. But the risk to your leather seats is real. A few sprays might not show immediate harm. Over time, though, the damage adds up. You could face faded color, stiff texture, and even cracks that require expensive seat restoration.
What Happens When You Use Windex on Leather Seats
So, can you use Windex on leather seats once in a while? Technically, a single light spray probably won’t destroy your seats overnight. But that doesn’t make it safe. Let’s look at what actually happens when Windex meets leather.
Short-Term Effects
Right after using Windex on leather, you might notice:
- A shiny or streaky appearance on the seat surface
- The leather feeling unusually dry or tight
- Color looking slightly faded or altered
- A chemical smell that lingers on the upholstery
These effects might seem minor. But they signal that the leather’s protective layer is being compromised. Think of it like sunburn on human skin. The surface looks fine at first, but the deeper damage is already starting.
Long-Term Damage
Repeated use of Windex on your leather seats leads to much bigger problems down the road:
- Drying and cracking: Ammonia removes moisture from leather. Without moisture, leather becomes brittle and cracks.
- Color fading: The dyes in leather gradually wash away. Your once-rich black or brown seats start looking gray and worn.
- Texture changes: Leather should feel smooth and supple. Windex can make it rough, sticky, or peeling.
- Voided warranties: Some car manufacturers specify approved cleaning products. Using harsh chemicals like Windex might void your leather warranty.
- Costly repairs: Severely damaged leather may need professional leather restoration or even full seat replacement.
The bottom line? The short-term convenience is never worth the long-term cost. Your leather seats are a significant investment. Protecting them means choosing the right cleaning approach every time.
Safe Alternatives for Cleaning Leather Seats
Now that you know the risks, let’s talk about what actually works. You have plenty of effective options for cleaning leather seats without causing damage. Whether you prefer store-bought products or DIY solutions, there’s something here for everyone.
Professional Leather Cleaners
The safest bet is always a cleaner made specifically for leather. These products are pH-balanced and designed to lift dirt without stripping the finish. Here are some popular and effective choices:
- Leather Honey Leather Cleaner: A gentle, water-based formula that works on most leather types.
- Chemical Guys Leather Cleaner: A fan favorite among car detailing enthusiasts. It foams and lifts grime effectively.
- Meguiar’s Gold Class Leather Cleaner: Conditions while it cleans, leaving leather soft and refreshed.
These cleaners typically cost between $8 and $15 per bottle. Considering the cost of leather seat repair, that’s a small price to pay.
DIY Cleaning Solutions
If you prefer homemade options, these alternatives are much safer than Windex:
- Vinegar solution: Mix one part white vinegar with two parts water. This mild acid cleans without the harshness of ammonia. Always test on a small hidden area first.
- Mild dish soap solution: Add a few drops of gentle dish soap (like Dawn) to a bowl of warm water. Avoid harsh detergents. Use a soft cloth dampened with the solution to wipe gently.
- Castile soap: This plant-based soap is extremely gentle. A small amount diluted in warm water works wonderfully on leather.
Comparison: Windex vs. Safe Cleaning Alternatives
| Feature | Windex | Leather Cleaner | Vinegar Solution |
|---|---|---|---|
| Safe for Leather? | No | Yes | Yes (diluted) |
| Contains Ammonia? | Yes | No | No |
| Dries Leather? | Yes | No | Minimal |
| Cost | $2-$4 | $8-$15 | $1-$3 |
| Long-Term Safe? | No | Yes | Yes |
| Effective Stain Removal | Moderate | High | Moderate |
What You Need: The Right Tools
Beyond the cleaning solution, the tools you use matter too. Here’s what to have on hand:
- Microfiber cloths: These are soft and non-abrasive. They pick up dirt without scratching leather. Avoid paper towels, which can be rough.
- Soft-bristle brush: Great for getting dirt out of stitching and crevices. Use gentle circular motions.
- Leather conditioner: This is just as important as cleaning. More on this below.
- Spray bottle: For DIY solutions. Make sure the nozzle produces a fine mist, not a heavy stream.
Step-by-Step Guide to Cleaning Leather Car Seats
Knowing the right products is only half the battle. You also need the right technique. Here’s a simple, step-by-step process for cleaning your leather car seats safely.
Step 1: Vacuum First
Before any wet cleaning, remove loose dirt and debris. Use your car vacuum or a soft brush attachment. Pay attention to seams, creases, and between seats. Dirt left behind can act like sandpaper during wiping, causing micro-scratches on your leather surface.
Step 2: Test Your Cleaner
Always test any cleaning solution on a small, hidden area. Choose a spot under the seat or on the seatback where it won’t be seen. Apply a small amount, wait a few minutes, and check for discoloration or damage. This simple step can save you from a big mistake.
Step 3: Apply the Cleaner
Spray or apply your chosen leather cleaner to the cloth, not directly on the seat. This gives you more control and prevents excess liquid from pooling. Wipe in gentle, circular motions. Work one section at a time. Don’t rush.
For stubborn stains, let the cleaner sit for 30 seconds to a minute. Then gently scrub with the soft brush. Avoid pressing too hard. Let the product do the work.
Step 4: Wipe Clean
Take a fresh microfiber cloth dampened with plain water. Wipe away any cleaner residue. Change cloths or water as needed. You want to remove all cleaning agents, not just push them around.
Step 5: Dry Thoroughly
Use a dry microfiber cloth to blot away moisture. Then let the seats air dry completely. Never use a hair dryer or heat gun. Excessive heat can damage leather. Keep your car windows slightly open or parked in a ventilated area to speed up drying naturally.
Step 6: Condition the Leather
This is the step most people skip, and it’s the biggest mistake. After cleaning, your leather needs conditioning. Apply a quality leather conditioner with a soft cloth. Work it into the surface using gentle circles. Let it absorb for 15 to 30 minutes, then buff with a dry cloth. Conditioning replenishes oils, keeps leather supple, and creates a protective barrier against future stains.
Quick Tips for Cleaning Leather Seats
- Clean spills immediately. The longer a stain sits, the harder it is to remove.
- Never use bleach or harsh solvents. These will permanently damage leather.
- Clean in the shade. Direct sunlight can cause cleaning products to dry too quickly and leave marks.
- Don’t over-wet the leather. Excess moisture can seep through to the foam underneath.
- Clean your leather seats every 3-4 months. Regular maintenance prevents buildup and preserves appearance.
How to Protect Your Leather Seats Long-Term
Cleaning is important. But prevention is even better. Protecting your leather seats from everyday wear and environmental damage means they’ll look great for much longer. Here’s how to build a solid leather care routine.
Apply a Leather Protectant
After cleaning and conditioning, consider applying a leather protectant or sealant. These products create a barrier against liquids, UV rays, and dust. Look for protectants that offer:
UV protection: Sunlight is one of the biggest enemies of leather. It fades color and dries out the material. A good protectant blocks harmful UV rays.
Water repellency: Spills bead up and wipe away more easily when leather is properly sealed.
Non-greasy finish: You don’t want your seats feeling sticky. Choose a protectant that absorbs cleanly.
Parking Habits Matter
Something as simple as where you park affects your leather seats dramatically:
- Park in the shade whenever possible. Direct sunlight heats up the car interior and accelerates leather deterioration.
- Use a windshield sun shade. This cheap tool reduces interior temperature and UV exposure significantly.
- Avoid leaving items on the seats. Keys, phones, and bags can scratch or stain leather, especially in hot conditions.
Regular Maintenance Schedule
Set a simple schedule to stay on top of leather care:
- Weekly: Wipe down seats with a dry microfiber cloth to remove dust and surface debris.
- Monthly: Do a thorough cleaning with a leather cleaner and soft brush.
- Every 3-4 months: Apply leather conditioner to keep the leather nourished.
- Every 6 months: Reapply leather protectant for continued UV and stain protection.
Sticking to this routine takes just minutes each week. It’s far easier than dealing with cracked, faded leather later.
Address Stains Immediately
Different stains need different approaches on leather seats:
- Ink stains: Use rubbing alcohol on a cotton ball. Dab gently. Wipe with a damp cloth afterward. Always condition after using alcohol.
- Food and drink: Blot (don’t rub) with a damp cloth. Use mild soap solution if needed. Dry and condition immediately.
- Oil or grease: Sprinkle baking soda on the stain. Let it sit for several hours to absorb the oil. Brush off, then clean with leather cleaner.
- Scuff marks: A gentle eraser or specialized leather scuff remover works well. Follow up with conditioner.
The key is always to blot, not rub. Rubbing spreads the stain and can grind it deeper into the leather fibers.
Common Mistakes People Make with Leather Care
Even well-meaning car owners make mistakes when caring for leather seats. Avoiding these common errors keeps your seats in top shape.
Mistake 1: Using Household Cleaners
This is the biggest offender. Products like Windex, 409, and all-purpose sprays are formulated for hard surfaces. They’re far too harsh for leather upholstery. Stick to products designed specifically for automotive leather.
Mistake 2: Skipping Conditioner
Some people clean their leather seats and never condition them. Cleaning removes dirt, yes. But it also strips away natural oils. Without conditioning, your leather dries out faster than before you cleaned it. Think of conditioner as moisturizer for your seats.
Mistake 3: Using Too Much Water
Leather is sensitive to excess moisture. Soaking your seats during cleaning can cause water to seep through the stitching and into the foam cushion. This leads to mold, mildew, and unpleasant odors. Always use damp cloths, not wet ones.
Mistake 4: Ignoring Small Cracks
Notice a tiny crack on your seat? Ignore it, and it’ll grow. Small cracks let moisture enter and spread damage. Address them early with leather repair kits or consult a professional for leather restoration before things worsen.
Mistake 5: Waiting Too Long Between Cleanings
When dirt and oils build up on leather, they create a layer that traps moisture and accelerates aging. Regular cleaning prevents this. Don’t wait until your seats look obviously dirty. Stay ahead of the problem.
Expert Insights on Leather Seat Care
Professional auto detailers agree on a few universal rules for leather maintenance. First, always condition after cleaning. Second, never use household cleaners on leather. Third, address stains immediately. Fourth, protect from UV exposure with quality protectants. These four habits separate leather seats that last 10 years from those that look worn in just 3.
Many detailing experts also recommend using a leather cleaning brush with soft bristles. It agitates dirt from the grain without causing scratches. Combined with a quality leather cleaner and conditioner, this simple tool elevates your entire cleaning routine.
Conclusion
So, can you use Windex on leather seats? The answer is clear: no. Windex contains ammonia and harsh chemicals that dry out, fade, and eventually crack leather upholstery. The short-term convenience simply isn’t worth the long-term damage to your car’s interior.
Instead, invest in proper leather cleaning products, learn the right techniques, and build a consistent care routine. Use gentle cleaners like vinegar solution or professional leather cleaners. Always condition after cleaning. Protect your seats from sun and spills. These steps are simple but powerful.
Your leather seats are part of what makes your car feel premium and comfortable. Treating them with the right care ensures they stay beautiful, soft, and durable for many years. Start today. Your future self will thank you.
Can You Use Windex on Leather Seats if Diluted?
Diluting Windex reduces the concentration of ammonia and other harsh chemicals, but it still isn’t safe for leather. Even diluted, Windex can strip the natural oils from leather upholstery over time. The risk isn’t worth the convenience. Always choose a leather-specific cleaner or a gentle DIY option like a diluted vinegar solution instead.
What Is the Best Household Cleaner for Leather Seats?
The safest household alternative is a mix of white vinegar and water in a 1:2 ratio. This solution cleans effectively without the harsh ammonia found in products like Windex. Apply it with a soft microfiber cloth, wipe gently, and follow up with a leather conditioner. Always test on a small hidden area first to check for any adverse reactions.
How Often Should I Condition My Leather Car Seats?
Most automotive leather care experts recommend conditioning every 3 to 4 months. If your car is often parked in direct sunlight or exposed to extreme temperatures, consider conditioning every 2 months. Regular conditioning keeps leather soft, prevents cracking, and maintains the rich color of your seats for much longer.
Can I Use a Leather Conditioner on Seats That Have Already Been Damaged by Windex?
Yes, but with realistic expectations. Applying a quality leather conditioner can help restore some softness and moisture to leather that has been dried out by Windex. However, if the damage includes significant fading, cracking, or discoloration, conditioning alone won’t reverse it. You may need professional leather restoration services for severe cases.
Are Steam Cleaners Safe for Leather Car Seats?
Steam cleaners can be risky for leather. The high heat and moisture can penetrate the leather surface, causing swelling, discoloration, or even mold growth underneath. If you choose to steam clean, use the lowest setting possible, keep the steamer moving, and never let excess moisture sit on the leather. A gentle wipe-down with a leather cleaner is usually a safer option.
What’s the Difference Between Cleaning and Conditioning Leather Seats?
Cleaning removes dirt, stains, and surface debris from leather seats. It uses cleaners designed to lift grime without damaging the leather. Conditioning, on the other hand, replenishes the natural oils that cleaning removes. Think of it this way: cleaning is like washing your hands, and conditioning is like applying hand lotion afterward. Both are necessary. Skipping conditioning after cleaning actually harms your leather over time.
This is a comprehensive guide about Can You Use Windex on Leather Seats?.
Key Takeaways
- Understanding Can You Use Windex on Leather Seats?: Provides essential knowledge
Frequently Asked Questions
What is Can You Use Windex on Leather Seats??
Can You Use Windex on Leather Seats? is an important topic with many practical applications.